These days most routers have an option to setup wifi guest network. The main purpose of a guest network is to allow your guests to get on your WiFi but keep them on a totally separate & secondary network. This keeps your curious guests or bored teenagers away from your computer which may have important documents such as tax returns, etc. If you are working from home, you really don’t want a call from your employer’s IT about some malware or virus on your work laptop, now, do you?
Here are some pros and cons of setting up wifi guest network that you should review before you take the step. Hopefully, this will provide some good information on what you are getting into and if this is the right step for your situation.
Pros
Increased security of your main network
Guests should get be on internet through a completely separate network called “the guest network”, and your main network should be unaware of what goes on your guest network, thus keeping your main network which may have your work laptop, personal computers safe.
Less frequent Password Resets
For better security, it is recommended you change your wifi password regularly, especially if everything is on one network (no guest network). However this requires you to update password on all your devices that need wifi such as Roku, Chromecast, Ring, etc. Well, if you have a guest network you don’t need to change it too often because you do not have new users every weekend on your main network and you probably do not need to change your guest network password either because you do not have any critical computers or devices using that network.
Less secure devices on guest network
These days we have so many internet-enabled or wifi-enabled or IoT devices like TV, Roku, Chromecast, Amazon fire stick which are not necessarily protected by anti-virus or firewall software. Some of these devices are weak links on your network which may be OK as there is not much harm can be done with them. However, increasingly these devices are coming with more features, which makes them attractive to hackers. The best way to solve this security hole is to throw such devices on the guest network.
More freedom for advanced Users
If you are an advanced user and you want to run a web server or you are a Minecraft enthusiast and you want to run your very own Minecraft Server on the internet, what better way than to do all your experiments on guest network? It is not just the people but there are bots (programs) on the internet crawling to find open ports, open computers to see how far they can get inside… Obviously when you begin to open up one of your computer to the internet, you need to tighten your primary network’s wifi security even more. May be install a good antivirus & firewall on all your PCs. (if you have Xfinity broadband, Norton Security has been free!)
Cons
Loss of access to network shares
While this depends on your router’s features, it is not very easy to open a read-only share of your videos or photos from a computer or NAS (Network Attached Storage) that is located in your main network to guest network or vice-versa. Some routers provide an option to keep shares accessible without compromising security but you may need to read the router’s manual to find out if such a feature exists.
Potential lower guest network speed
There are some reports from users of some routers that their guest network is either slower or may even cause just over all slow down. This may be specific to the router, or the time speed was tested, but so far I have not noticed any slowdown of my Netgear N450 CG3000DV2. Should you suspect this to be the case with your network, try rebooting the router a couple times. You can use online tools such as speedtest.com to your wifi/internet speed at different times of the day.
You can see the pros outweigh cons, at the very least you can selectively add devices into your primary network and leave everything else in guest network.
How to enable Guest Network on Netgear N450 (should be very similar with other routers)
Login to your router
You may need to open up your router’s manual (if you no longer have it on you, you can google it’s brand and model and you should be able to pull down a user/admin guide). Here is the IP address for my Netgear N450, to login to http://192.168.0.1/ [Unfortunately this router does not seem to have a secure http to connect] The default user id is admin and the default password is password – yes, very creative! But please, please change the default password!
Setup Guest Network
Go to Advanced tab at the top, click Setup on the left, then Guest Network menu item. See picture below:
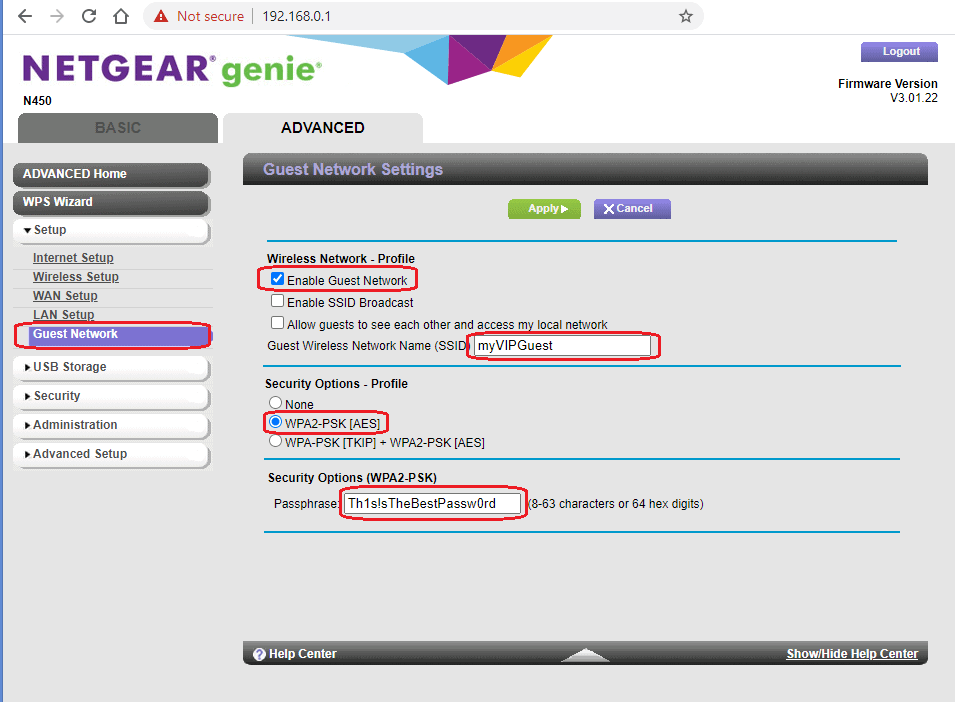
On the right pane click the checkbox to enable guest network. Enter SSID (any name you would like to give your guest network). I chose 2nd security option WPA2-PSK[AES] – I had a problem with an old device not supporting the other option – but this is pretty secure. You should also enter a very strong passphrase [don’t worry what you see in screenshot is not my password 🙂 ], something long enough and easy to remember!
Should I broadcast my WiFi SSID?
Note that I did not check “Enable SSID Broadcast” in the screenshot above, most people prefer to check it, as this will show up when you look up the networks available to connect to. While this is very convenient, it is probably slightly secure to hide your WiFi. If you do not check, your guest network will not appear in the list and this is how you(or your guests) connect to it:
Windows PCs
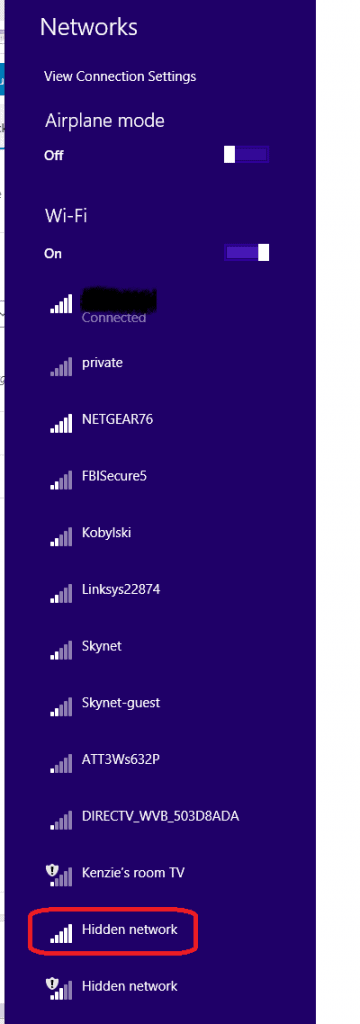
To connect to a WiFi network that has no SSID broadcasted(a.k.a “hidden network”), you will have click on “Hidden Network” option, which shows in the same list where you see all available wifi networks. You may see multiple WiFi connections with that name, choose the one that has strongest signal(most bars), like below.
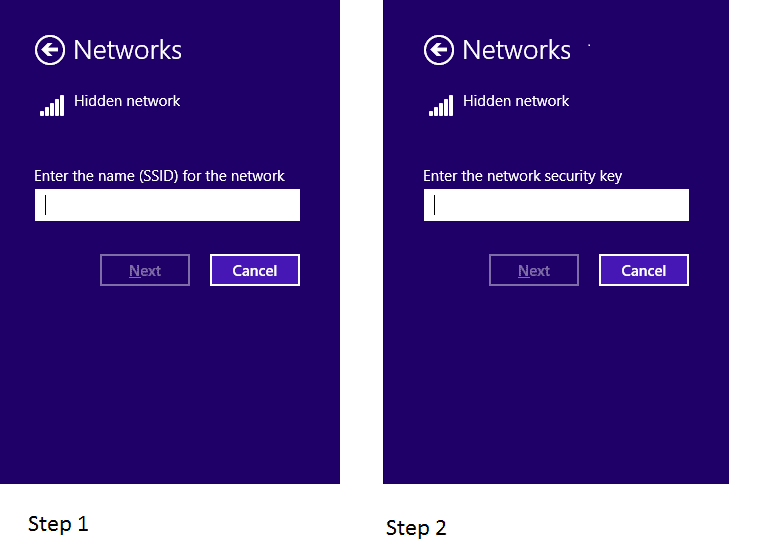
Next, you will get an option to enter the SSID and password of the network you are trying to connect to, like below:
iOS Devices(iPhone or Mac)
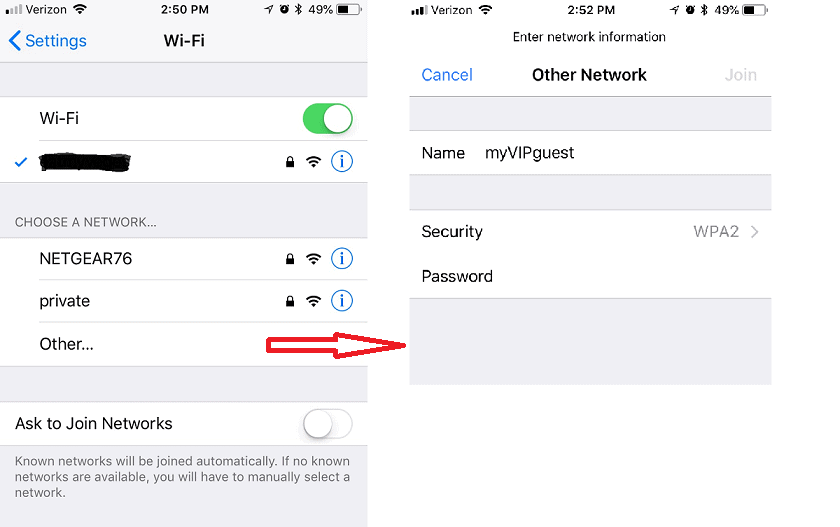
It is slightly different for iOS, your network will have “other” as a wifi network to connect to, if you click on that you will get an option to enter the SSID of the hidden network, its password and security protocol option. Note the WPA2 option I setup is not the “WPA2 Enterprise” but the regular WPA2.
Good luck and kudos for taking action to make your network more secure.